Friday 31 March 2017

The Jouer Long Wear Lip Crème Liquid Lipsticks

Jouer Creme Long Wear Lip Creme Liquid Lipstick Review
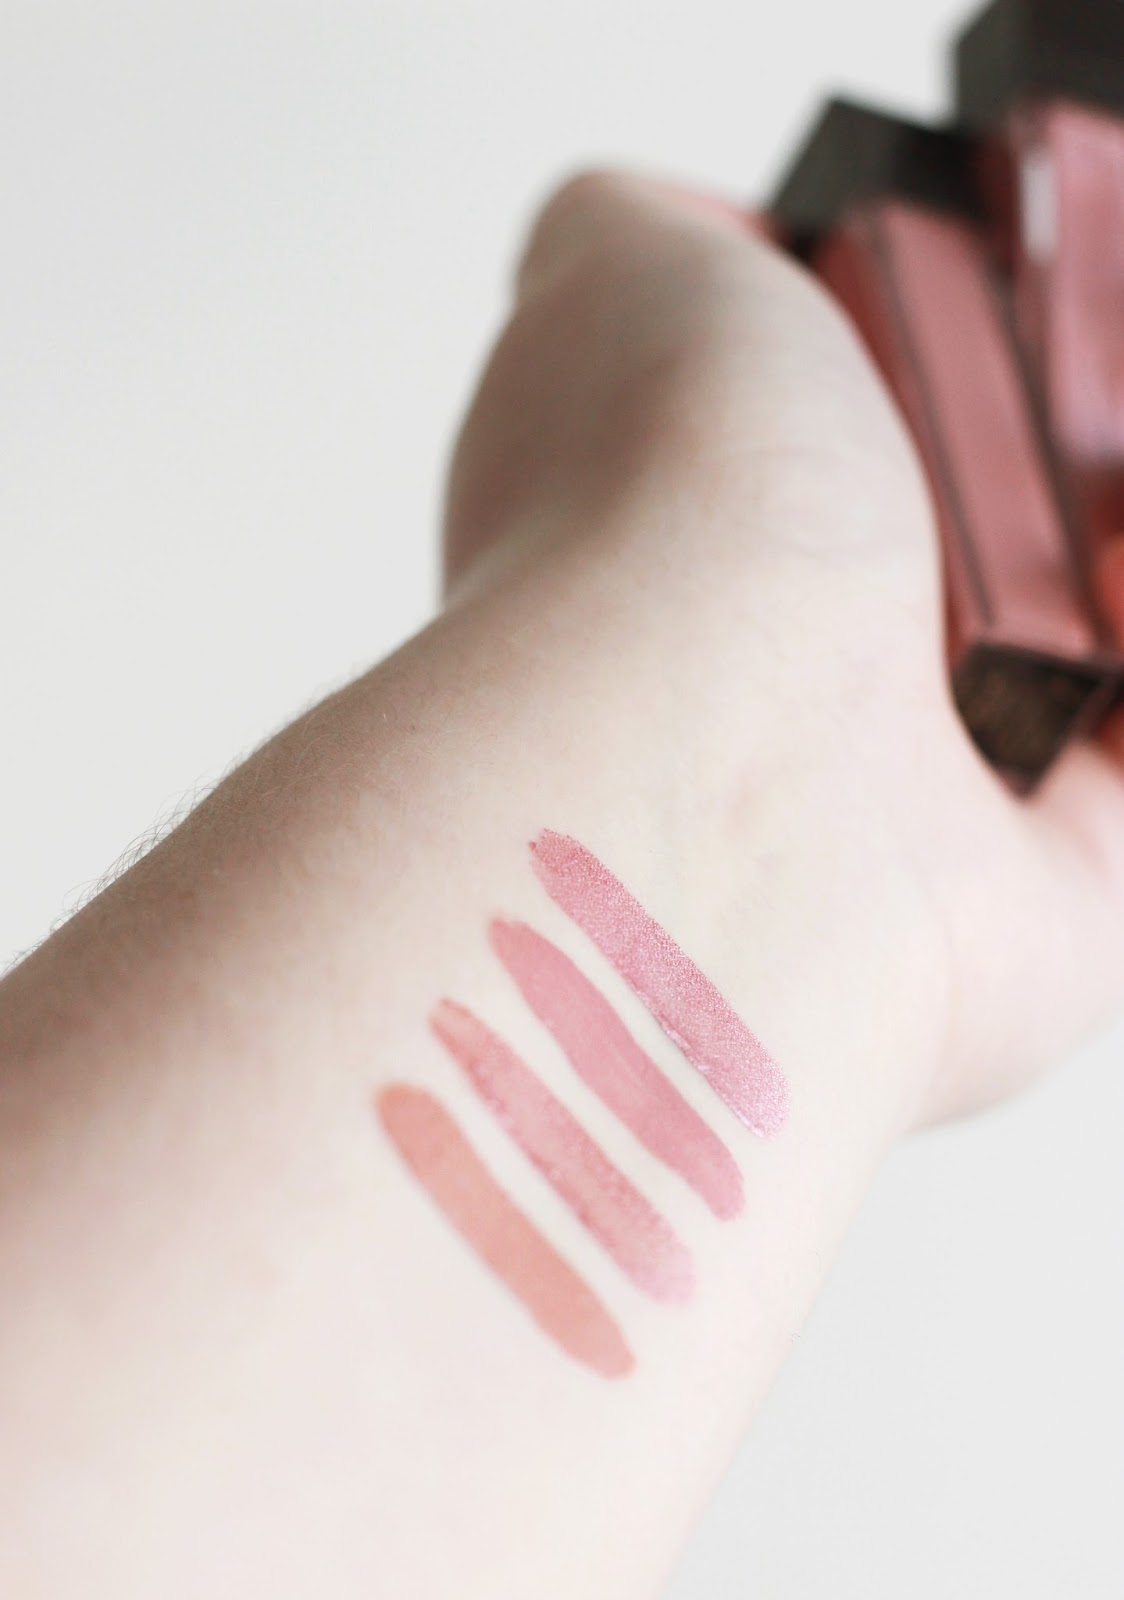
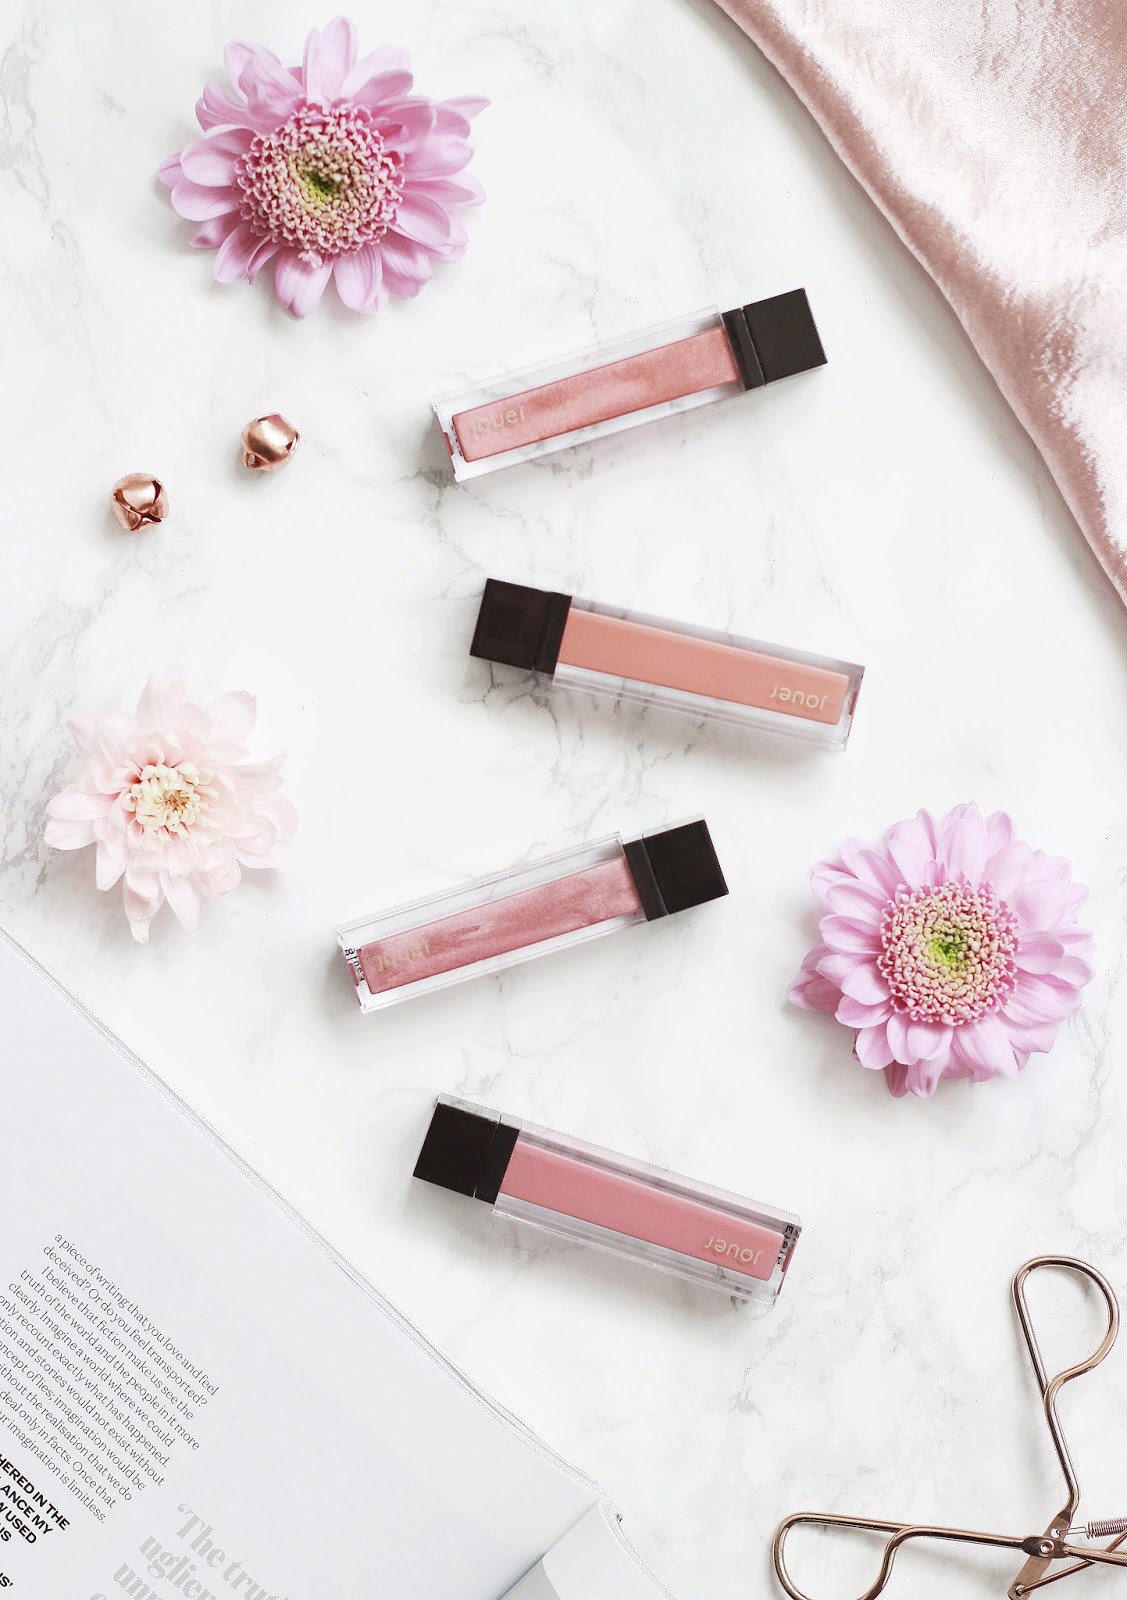
As I'm sure you're all aware by now, I have been having a bit of a love affair with liquid lipsticks over the past year or so; testing and trialling a range of formulas and finishes to find my favourites. The Jouer Long Wear Lip Crème's* have been on my wishlist for some time and I'm so happy I now have four in my collection. Today I thought I'd give you a run down of my thoughts. 

As soon as I opened the package, my eyes instantly gravitated towards Dulce De Leche, a matte, cool toned-pink nude. It looks perfect on it own, as it compliments my skin tone and lasts all day, however when paired with Citronade Rose it gets even better. The metallic hue on top works to make your lips look fuller and wider, whilst still being super wearable from day to day. It's my current favourite duo that I can't get enough of and will no doubt be an essential of mine this Spring. 


Creme Brûlée is described as a warm toned hue, however I would describe it more as a coral nude shade - Perfect for the warmer months. With a fresh, dewy base this looks absolutely divine and it is actually really easy to make it a little more subtle just by tapping it onto the lips for a quick colour. 


I wouldn't say I've ever been drawn to metallic lipsticks before and, although my love for Citronade Rose is strong, Praline- a more darker, full on shade- is one I'm still trying to find a use for. I have used it as a topper for many lipsticks and I haven't yet found a great pairing such as the one I've previously mentioned. 


This range actually has a passing resemblance to the NYX Soft Matte Lip Creams, especially with their whipped texture and vanilla buttercream scent, however the Jouer offerings are more like traditional matte liquid lipsticks. Although not as comfortable, they are perfect if you're looking for a long lasting, pigmented lip shade. 


Have you tried the Jouer Long Wear Lip Crème's? 

If a product is marked with a * it is a PR sample. This post contains affiliates. 
SHARE:

Thursday 30 March 2017

How I Edit My Blog Photography

Although there is a general process I go through when editing my blog photographs, it does tend to change depending on the problem I'm trying to solve. Whether it's brightening, removing dust or colour correcting, I really feel like I have improved my photography as of late through editing and learning more about how to use Photoshop. 

Curves | This has always been one of my favourites when it comes to editing, as it enables me to control how bright I want the image to look as well as helping me to control shadows. I start by working with the upper part of curves to highlight the photograph and work my way down. There's no magic formula to working this, as it all depends on the photograph you've taken and how dark it was originally. I would suggest that, as it's quite easy to overexpose and over edit, it would be best to start small and work up. 


The 'Quick Selection Tool' down the right hand side can help you in getting the right amount of contrast. If I've gone a bit too far with curves, but I like the way I've brightened the background. Quick selection can enable you to darken a lipstick so that it looks like the colour it actually is or to make a blusher look a little sharper against it's background. This page may be a good place to go if you want to know more about this particular tool. 


Saturation | If you've got Instagram, you've probably played around with the saturation at some point so may know a little bit about what it does. The further left you go on an image the less colour remains, the more right you go the more vibrant the colours become. For my photography, I tend to opt for -15 as this still allows the hues to pop, but they never overpower my photographs. It can also help if you're experiencing colour correcting problems.


Cropping | Every image I take is either cropped or straightened in some way. It helps with the composition of a flatlay in particular and enables me to frame a product better. There isn't a set photograph length and width I use as it's all about the individual photograph that you're trying to crop. 


Colour Correcting | You see the little icon that looks like balancing scales? This is called colour correcting and it has changed the way I take my photographs. I'm probably one of the only bloggers that hates blue skies when it comes to blog photography and would rather a session when there's white, fluffy clouds in the sky to help act as a giant soft box. Although I prefer taking photographs in these conditions, when I'm unlucky and my camera catches more of the blue tones, colour correcting has helped save quite a few images of mine. 

Depending on the colour you're trying to conceal, the bars are quite self explanatory. If you're battling blue hues then you'll want more of the yellow or red tones and vice versa. Saying this, I do think it's all about playing around with the settings to suit your photograph. Not only can they help to save flatlays, this tool can be your best friend if you're trying to emphasise on certain colours in an image. 


Removing Dust | I remember seeing this on From Roses' post last year and it completely changed my life. Exaggeration? I think not. If you've ever struggled with makeup smudges on your makeup packaging or a strand of hair that has made its way onto your flatlay, then the "Spot Healing Brush Tool" -found on the left hand side of Photoshop- is perfect. Using the layers on Photoshop, you click on background layer then on the brush tool to remove dust particles in a matter of seconds. 


How do you edit your blog photography? 
SHARE:

Wednesday 29 March 2017

A Lush Spring Haul

Although Lush bath bombs and bubbles are associated with the colder months and rainy days, I can never resist any of their new releases and I today I am giving you the lowdown on my top Spring picks that will have you pampered and preened in no time. 

Although I wasn't too impressed with the Easter range due to the lack of Fluffy Egg, I knew I wanted to pick up a few pieces anyway. The Golden Egg was the first in my basket as this chocolate toffee scented offering entices you into the gold filled bath and leaves your body feeling nourished. It smells absolutely divine and I will no doubt be going through a lot of these before Easter is over. It goes without saying that if you're not a fan of glitter, then you won't be a fan of this, but for me it's the perfect Spring treat. 


I was actually surprisingly drawn to Ups-A-Daisy, a floral fragranced bath bomb that smells incredibly dreamy and right up my street! This is slow releasing and creates a soft, almost fluffy layer on the water which is coloured like the morning sunrise. This is one of my favourites as it's much bigger than I imagined, smells of roses and is a great pick me up if I'm having a slow morning on the weekend. 


I've got to admit that I bought the Grass Bubble Bar as it reminds me of the fresh, green grass in the Springtime with dainty white flowers and it certainly didn't disappoint. With added bergamot and neroli oil, this lifts the mood, just like the website says and is a perfect pick for the warmer months. It's much stronger than I anticipated and I'd almost go as far as saying it's the product that gives off the most fragrance as it really lingers in your bathroom just by having it out in a basket. 


The Bunch of Carrots have quickly become one of my long-time favourites. These reusable bubble bars easily crumble into your bath and are great at creating refreshing bubbles that you just want to dive into. I find these great if you find a bath bomb too overpowering when the weather starts to get warmer and you just want to bathe in a light scent. 


I always like to have one or two Lush shower gels stored in my collection and the Comforter offering is one of, if not my all time, favourite. The berry scent is uplifting, lathers up nicely and it lingers on the skin for hours on end. It's a staple in my shower during the hotter months as it never fails to fill the air with it's fragrance and refresh my body.  


Have you picked anything up from Lush recently? 
SHARE:

Tuesday 28 March 2017

A Spring Pampering Routine

We're currently in the midst of the transitional period between when we want to bundle ourselves up in blankets, read books with candles, and when we're in need of the lighter evenings with fresh blossoms splayed on our windowsills and makeup to suit the changing season. Although I can't help but want the crunchy leaves, pumpkin carving and any excuse to watch Harry Potter back, I've actually been enjoying the slightly warmer weather and pampering myself semi-regularly. 

When I'm truly pampering myself I like to make sure I spend all day taking care of myself, sinking into a bath full of bubbles and delving into my favourite page turners. Saying this, some days I do like to play around with makeup and venture outside for a walk for some fresh air. The Hourglass Ambient Lighting Blushers have been a favourite of mine recently as they add the perfect pop of colour to my lacklustre skin and a bright lip always helps to perk up my complexion too. 

I've previously touched upon how dehydrated my skin gets at this time of year; when the weather doesn't know whether it wants to be warm or cold, my skin gets painfully dry patches that only certain skincare can treat. The Origins Drink Up Intensive Mask and Aesop Fabulous Facial Oil is a duo that I can't get enough of lately as it deeply hydrates, making for a smoother base and it genuinely works well when incorporated into a skincare routine that's more focused on nourishing my complexion. I'm hoping to add a Foreo or Jade Facial Roller to my routine soon to ensure that my skin is kept in tip-top condition over the next few months. 

As I preciously touched upon, there's nothing my parched skin loves more than a invigorating and uplifting bath bomb to quickly heal my body's dry areas. For an extra dose of hydration, I like to opt for a in-shower moisturiser like the Lush Ro's Agran Conditioner as this means that my body still feels lightweight and nourished without the faff of the extra step post-bath. 

Painting my nails and pampering my usually mistreated hands is something I've been enjoying lately. Essie's Not Just A Pretty Face is one of my top picks as it's a light nude-pink hue that wears well and suits a wide variety of outfits. The Lush Lemony Flutter is the perfect addition to my pamper routine as it not only can be used to nourish cuticles, it's a great all rounder if you've got parched skin. 

Treating yourself doesn't have to be just about skincare and body care, in fact I find spritzing my favourite perfume is the perfect pick me up on a day-to-day basis. This Aerin Lilac Path EDP is a much loved fragrance of mine and is very fitting for Spring. 


How do you pamper yourself in the Spring? 

If a product is marked for a * it is a PR sample. This post contains affiliates. 
SHARE:

Sunday 26 March 2017

Dewy Products That Look Perfect Underneath Your Makeup

Highlighters, oils and glow inducing primers have all helped to add a healthy sheen to my usually lacklustre complexion and they have transformed the way I apply my makeup, so I will no doubt be taking this technique into Spring with me. Today I am sharing with you my top dewy products that look perfect underneath your makeup. 

SHARE:

Friday 24 March 2017

5 Products I'm Taking Into Spring


Now that it's officially Spring, I have been repurchasing old favourites and lusting after new releases. Dewy bases and perky pink blushers are just some of the products I bring out during this time and I thought I'd do a post about the five items of makeup I will be taking into Spring with me. 

SHARE:

Thursday 23 March 2017

Creating Blog Ideas Without Spending A Penny

Whenever I am in a blogging rut, I always go to spend some money on new releases or products that have been on my wish list. Although this usually works a treat to help me feel inspired once again, it isn't a habit that I like to do often. I have several techniques that help me generate blog ideas that I've previously written about here, but today I thought I'd share with you some tricks that I like to use when I don't want to spend a penny. 

Look At What You've Got | Whether you've got 10 products or 100, there are always different ways to look at your collection and generate new blog post ideas. Even if you've got unused products at the back of your storage or makeup that you don't like, those are ideas for posts in themselves. My favourite way to do this is by sharing seasonal makeup looks or lipsticks of the same shades. 


This doesn't have to just apply to makeup, featuring the blogs, books and programme's you've been loving are great ways to not spend a penny. Often books are left on the shelf once you've read them, go back and feature "The Books I Loved When I Was A Child" or "Books I Want To Re-Read: Spring Edition". 


Go Outside | If you've got a blog that is solely about beauty, this one might not be for you, but I find there's a lot of content to be found just by heading out your front door. Cherry blossoms, fresh blooms or just photographing day-to-day life are all ways to get photographs and from there you can do posts such as monthly to-do lists or personal rambles. 


Although I said going outside can get you content, staying inside can too. Why not share a bedroom tour? 


Revisit Old Posts | When I want to generate new ideas, I actually find looking at the old posts give me the most inspiration. Whether it's updating your everyday makeup or using the products in older posts to remind you which products you need to dig out; this is a great way to create blog post ideas without spending a penny. 


Here are a list of blog post ideas that you can use:

- Everyday Makeup 
- A Seasonal Wishlist 
- Bloggers That Inspire You 
- Monthly Goals 
- Morning/Evening Skincare Routine 
- A Pampering Ritual 
- What To Do At The Weekend 
- Favourite Books + Hobbies 
- A Day In Photographs 
- Easy To Wear Makeup 
- Daily Lipsticks 
- Favourite Programmes To Watch On Netflix 
- Pink Blushers For Spring 
- How I Edit My Photographs 


How do you create blog content when you're on a spending ban? 
SHARE:

Wednesday 22 March 2017

Makeup For Dehydrated Skin

Over the years that I've been wearing makeup I've had every skin type, going from oily to combination, sensitive sometimes and now I'm currently in the dehydrated, lacklustre phase. Although it's usually just foundation and base products you have to be wary off when you've got dry skin, I have found some amazing products that help to boost hydration and promote radiance, so I thought I'd share them with you today. 

For a long lasting base, I have been using the Nars Radiance Primer and although the scent can be off putting especially if you have skin that doesn't react well with perfume, the pearlescent sheen helps to boost and perk up dull complexion. 

I've got an array of concealers that work well with dehydrated skin, in fact I think I've pretty much got it all covered. Although I'm not usually one to switch them up regularly, the NYX HD Concealer has been one of my favourites for some time especially for dull, dark under eyes. 

Powders are always a hit and miss for me and although they are used to set your makeup, they don't always have to be there to completely mattify either. The Bourjois Poudre De Riz De Java is a new addition, but one that promotes radiance and its finely milled powder does a great job of mattifying just the right amount. Another great pick is the Hourglass Ambient Lighting Powder which adds colour to your complexion, whilst blurring imperfections and adding a soft, lit from within look. 

Although cream blushers work wonders on dehydrated cheeks because they don't emphasis on the dry patches, I find that my already flushed face doesn't cope well with them. I have been opting for the new Hourglass Ambient Strobe Blush Palette for a soft, pop of colour to the cheeks. I own far too many highlighters and whilst powder is the formula I own most of them in, I'm forever smitten with my Topshop Polished Cream Highlighter and Cover FX Custom Enhancer Drops 

What are your top makeup products for dehydrated skin? 
SHARE:

Tuesday 21 March 2017

Five Favourite Things

Now that it's officially Spring I have been dreaming of the fresh blooms, longer daylight hours and spending more time in the garden. I've been on the hunt for a tasteful garden bench so that I can spend my mornings with a book once the weather gets warmer and I have been embracing all things floral. Today, I thought I'd share with you five of my favourite things at the moment. 

The Start Of Spring | With the weather still being sporadic and not knowing whether it wants blue skies, fluffy clouds or drizzly rain, I have been undecided on whether I want to sit outside with a picnic or snuggle under copious amounts of blankets watching Harry Potter. Saying this, I've been enjoying filling our house with fresh flowers weekly and by embracing the changing season. I've already spotted several cherry blossom trees that I can't wait to take snaps of when it starts to get warmer and I no doubt will be enticed into heading out into my garden to plant some new flowers to watch grow. 

Embracing Dewier and Lighter Makeup | I've been really enjoying doing makeup round ups on my blog at the moment and have been embracing lighter makeup, whether it's a fresh, dewy base or a subtle pink lip. I've got some exciting posts coming up and have been working on many Spring themed posts - Keep your eyes peeled! 

Spending More Time Outside | Despite battling harsh winds and spending a considerable amount of time with rosy cheeks, our adventure to Wales in February really made me feel like I needed to spend more time outdoors. It can be easy to stay cooped up indoors, but I've made it my mission to get to our local RSPB's and National Trust's for a leisurely stroll regularly. Now that it's getting dark later, I hope that I can really make the most of this and go after the working day is done. 

Smoothie Bowls and Fresh Veg | I've already started indulging in mini eggs, making my way through a packet a week at least, so because of this I have been incorporating more fruit and vegetables into my diet, which is a regular thing that I do when we head into the warmer seasons. I have been concocting several different smoothie recipes and creating a mango, banana and vanilla essence "nice cream" which goes down a treat when I need something sweet. 

New Homeware Inspiration | I had a quick Spring clean at the weekend, throwing out anything I no longer have use for and sorting out what new additions I want to add to our home. I've got a few things on order, ready to add more colour for the warmer months and I have found some new found inspiration too. I'm still on the hunt for the perfect sized cactus to put in the Urban Outfitters Adelphi Planter and I'm thinking that these H&M Dusky Pink Cushions would look great on fresh, white bed linen. Below are some of my top homeware picks and I will no doubt be investing in one or two over the upcoming months. 

What have you been loving lately? 
SHARE:

Monday 20 March 2017

A Spring Scent


Every year at the start of Spring I like to dig out or purchase a new fragrance to mark the occasion. I've been lusting after this perfume for a while and I was lucky enough to receive it at Christmas, but decided that I wouldn't use it too much until the warmer months. Today I am sharing with you my thoughts on the Aerin Lilac Path EDP

With a concoction of fresh blooms and crisp leaves, this floral scent is one of my all time favourites. Fresh galbanum, orange flower and jasmine lactones compose this floral fragrance which makes it feel very luxe and flattering to wear. You only need a few spritz for it to linger on your skin all day long and, as someone who tends to go through a bottle every three months, it doesn't seem to go down quickly either.  

Although the scent itself is gorgeous, you can't deny that the packaging is equally dreamy. With a blush pink stone on top and gold detailing, it'll not only make make you smell nice, it'll look great on your dressing table too! There's no denying that it's definitely a splurge and a once in a while treat, but I couldn't think of a better scent to take me through the Spring and Summer seasons. 

Have you tried any of the Aerin fragrances?
SHARE:

Sunday 19 March 2017

The Blogger Made Me Do It

As someone who has been reading blogs for as long as I can remember, I've been enabled many times into buying products, whether it's a new release or a cult favourite. Today I thought I'd share with you the bloggers that have enabled me recently. 

I've got to admit, there were a few people who tempted me into buying the Hourglass Ambient Strobe Lighting Palette, however my conversation with Meg Hobson and then seeing it on Makeup Sessions just persuaded me even more. The swatches looked dreamy and I knew it had tone in my new Spring makeup addition. It's made up of three divine shades that all add a pop of colour to my cheeks without being too overpowering, but instead it looks great with simple, everyday makeup. 


The Sleek Solstice Palette has become a cult beauty over the past year and for a very good reason to. This quad is made up of a range of glow including powders which will make your highlight visible from space, but it was actually Gemma Lousie's blog that first tempted me. Gemma continues to enable me now with her gorgeous flatlays and hauls, so no doubt you will be addicted too. The palette itself has a range of uses as it can look great over the cheekbones, in the inner corner of the eyes and over the cupids bow. A high street gem that can't go wrong. 


I had actually been eyeing up the Essie Not Just A Pretty Face nail polish before I saw it on My Laura Life's blog, but after spotting it on one of her posts, I couldn't not get it. It's the perfect nude-pink hybrid that gives the impression of elongated fingers and is the perfect everyday shade. 


Friday Faye was actually the blogger who inspired this post, but it was her dreamy photographs that first drew me to the Bourjois Java Rice Powder. Although the extra speckles of sparkle can put you off with the initial swatch, once on the face it adds just the right amount of glow, whilst reducing shine at the same time. If you're looking for a soft fragranced powder that just makes you look that little bit more healthy then look no further.


You're probably wondering how I've managed to narrow down who enabled my Diptyque candle obsession and the answer is I don't think I ever could. However, I know that it was From Roses who first made me want to have a sniff of Vanille as I kept seeing it mentioned and featured on her blog. Even when this candle isn't lit, it fills the room up with a delicious scent and when burning, it's gives off a strong throw. 


Which bloggers have enabled you? 
SHARE:

Saturday 18 March 2017

4 Helpful Pinterest Tips That Anyone Can Use

After the success of my last blogging tips post and the response I had in regards to Pinterest, I thought I would dedicate a whole post to Pinterest tips. A few of my favourites posts are this one from Thirteen Thoughts and Pink Pot's. I have compiled a list of 5 helpful Pinterest tips that will help your account grow and excel. 

Treat It As An Extension Of Your Blog | This is my number one top tip as although growing your following is great, making boards that reflect yourself and your blog is just as rewarding too. I only pin photographs that I love and are aesthetically pleasing to myself, meaning that it doesn't get cluttered with photographs that no longer inspire me in some form or other

I've got over 30 boards, ranging from yummy food to homeware inspiration, but setting up a board just for my blog was one of the best things that I did. It not only reminds me to add all my Instagram and blog images to it, but it keeps everything all in one place for other people to see too. I've also moved my account over to a business one, so I can keep track of what's working well and what isn't, as well as my analytics - I went from 100,000 to 600,000 monthly Pinterest viewers in a matter of weeks just by pinning a lot and following these tips. 

Pin, Pin, Pin | Every morning when my post goes live, one of the first things I do is promote it via Pinterest through my "pin it" button attached to each post, then I will aim to pin between 5 - 10 pins afterwards. In the evening, I tend to find myself on Pinterest too, so that's when I aim to pin around 10 - 15 pins just to keep my profile active and entice people to visit my account. By pinning more, I've actually started to get a lot more people visiting my blog from Pinterest, which is a win-win situation for me. 

A day doesn't go by when I don't use Pinterest and I think my consistency has really helped me to utilise my Pinterest account, in fact I've just started using Tailwind; an app that enables you to schedule pins, which is perfect if you know that you won't get on in a week but you still want to remain active. 

Join Sharing Boards | Just like Instagram pods, there is such thing as Pinterest sharing boards whereby you can share your own pins and views other's. Even if it's just to find other accounts and support other bloggers, joining Pinterest boards can help you gain inspiration and get some exposure for your pins too. There will no doubt be a few still open to newcomers or you can always ask around on Twitter, or if not, why not start your own?

Add Descriptions | Until I read this on another blog, I had no idea that Pinterest gave you the ability to not only add a description to your own profile, but to each board too. Adding one to each board means that people will have a better understanding of what the board includes and when people search for a specific word you're more likely to show up. I need to practice what I preach on this one as I'm yet to update and rewrite some of my descriptions, but it's the first thing on my to-do next week. 


Likewise, did you know that you can change the cover photographs on your boards? Just go to the board, click edit and select cover, there you will be able to change it to your desired image. Since taking care of my Pinterest and tailoring it to my own tastes, I've actually found that people are visiting me more. 

What are your Pinterest top tips? 
SHARE:

Friday 17 March 2017

A Nars Round Up

From soft and perky pink blushers to primers which add radiance to your base, Nars is a brand that I come back to time and time again. Their sleek black packaging looks great in your makeup collection and their high quality product always entices me back for more. Although I'm sure that my Nars collection will continue to grow, I thought I would share with you my top picks. 

The Nars Radiance Primer is a new addition, but one that has been welcomed into my makeup bag with open arms. I've been without a primer for some time now, so when I spotted this offering, I knew I had to get my hands on it. It promotes radiance and, when applied to the high points of my face, it gives a dreamy glow underneath your base - Perfect if you're using a lightweight, dewy foundation. 


Let's ignore how dirty Nars packaging gets and turn our attention to the Soft Velvet Loose Powder; the most underrated Nars product. I'm quite a loose powder fiend, building up quite a collection over the years, and this one adds just the right about of radiance and prolongs the wear of your makeup - Everything you need in a powder. 

For cheeks, the Copacabana Illuminator is one of my most used Nars products, in fact I'm running quite low which is an achievement considering I own quite a lot of highlighters. This pearly pick adds a sheen to the skin and when applied all over before your foundation, it delivers a luminous, healthy looking base.  

If there's one product you need to hunt down from Nars, it's the Dual Intensity Eyeshadow in Rigel. I feel like I've gone on and on about this product, even dedicating a whole post to it, but it truly is one of my most used highlighting shades that is great for brightening the eyes and complimenting a wide range of hues. If you're looking for a lazy, quick smokey eye, then the Kalahari Eyeshadow Duo is perfect. The copper pairing compliments my blue eyes and saves time in the morning - Bonus!

The Velvet Matte Lip Pencils have been a must have of mine for some time, Cruella and Bahama being two that I would recommend. They're super creamy, long lasting and come in an array of hues to suit all needs. 

I'm currently eyeing up Bumpy Ride and Deep Throat Blushers as they both look like lovely pinks that will no doubt add a gorgeous hue to my cheeks this Spring and Summer. 

What Nars products would you recommend? 


SHARE:

Wednesday 15 March 2017

Transitional Skincare Which Works Wonders

I tweeted about my skin playing havoc during the transitional period between Winter and Spring and I was surprised with how many people empathised with me. My skin is currently having a flare up and I'm struggling to treat my dehydrated complexion with my normal skincare routine. I've gone makeup-free for a bit now, and after trying this concoction of products, it's safe to say they that have worked wonders. 

I've been keeping my cleansers to a minimum as I've not been wearing any makeup, instead only using the Garnier PureActive Sensitive Tonic* and face wash* to remove any dirt from my face without drying my skin out further. I've kept it simple because my skin doesn't react well with the constant changing of products and I've really noticed the difference in trying to get my skin back to tip top condition. 

Oils are a daily must have for me and if you've got a dehydrated complexion like myself then you'll understand the excitement when you find a new love. The Caudalie VineActiv Overnight Detox Oil* is perfect if you like an intensive treatment that almost works as a lightweight mask for your skin, promoting radiance and nourishing all in one go. This is 100% natural, which is something my skin really reacts well to, especially when it's having on of it's sensitive moments. 

The Aesop Fabulous Facial Oil has made a huge difference to my complexion this month as it's my top pick whenever I'm suffering with painful breakouts; it just seems to treat them perfectly and reduce the redness over a couple of hours. This oil works exceptionally with the Kiehl's Ultra Facial Cream, a favourite of mine for some time now. It's really light weight and when applied to the skin it sinks in quickly, hydrating any dry patches as it goes. 

Aside from the oil, the Caudalie VineActiv Eye Cream* was a stand out product from this range. Although it takes a while for the real benefits of eye cream to be visible, I'm always open to any product that can help to banish my dehydrated under eye bags for a fresh look. 

What are your favourite skincare picks at the moment?

*PR SAMPLE 
SHARE:

Monday 13 March 2017

Choosing The Right Blusher For You

Hourglass Strobe Lighting Blusher, NYX ombre blush, milani rose blusher
Of course it goes without saying that makeup is all about experimenting, wearing products that makes you feel great and using the shades that you want to. However, I know a few people would be interested in what makes the perfect blusher and how to choose one that's right with you. 

Consider Your Skin Type | Although I've got dehydrated, lacklustre skin and I'm meant to be fond of a cream blush formula, I can never get on board with them. Don't get me wrong, I like one or two, but I do need to find more cream offerings that don't cling too much to my dry patches. When buying a powder blush, which would be more suited to those with oily skin, I like to consider what finish it has. When I had oily skin I was more keen on matte as it didn't emphasise on my already oily cheeks, however as I've grown up and my skin has become more dry, I have become more drawn to satin and shimmer finishes as it looks more natural on my complexion. 

What Are Your Undertones? | In general, I pay a lot of attention to the undertones in my skin; whether it's finding the right foundation to match or just giving you some inspiration as to what blusher would suit the most. I found this really helpful when determining what shades would look best on my skin tone and the post is great at suggesting how your undertone can affect the what shade your cheeks will go when you blush. 


Matte or Shimmer | As I previously touched upon, my taste in blushers have changed over the years, however I do enjoy having a broad range of colours, formulas and finishes as they change with my mood. I wouldn't say that oily skin must always go for matte or those with dry skin must find a shimmer as I find it's what I'm most drawn to and it tends to be all about finding a balance. Matte is my preferred finish when paired with other long lasting makeup products, but satin and shimmer finish are great for when I want dewy skin or when I need an extra boost to my complexion.


My Top Picks | I thought I would share with you my top blusher picks as I've built up quite the collection. The new Hourglass Strobe Lighting Palette has been a great addition to my makeup bag as all the shades perk up my skin and adds a natural flush of colour to the cheeks. The NYX Ombre Blush has been mentioned many times on my blog, so of course it had to be mentioned in this line up, but it's actually the Becca Pamplemousse Split Pan that I've been reaching for the most. 

What are your favourite blushers? 
SHARE:

Sunday 12 March 2017

Small Changes That Make A Big Difference To Your Makeup

Sometimes, the smallest of changes in your makeup can make the biggest of differences. I've been trying out several new techniques and a few new products to make my makeup easily to apply, look better and feel better too. I am thinking of making this sort of post into a regular series on my blog as I've really enjoyed compiling this list.

I've never really been one to use a primer but if there's one I love, I tend to stick with it for a while. Although I used to think they were a fad, every time I don't use one I notice the difference in the finish of my base and the longevity too. If you're still not sold, then even just applying moisturiser before your makeup can make a huge difference, especially if you have dry skin like myself. 


If there's one thing that has transformed my makeup routine it is using a concealer that is several shades lighter than my foundation when brightening the under eye area. I currently use the NYX HD Concealer and it works a treat at diminishing the appearance of dark circles. 


I'm not sure if everyone knows this by now, but I certainly didn't when I first got a Beauty Blender. For a flawless finish or if you want to refresh your makeup throughout the day, damping a makeup sponge is the easiest way to do this. Likewise, adding a spritz of water to the end of a highlighting or eyeshadow brush is a great way to intensify the pigment and give off a stronger finish. 


For an instant eye brightener, I use a nude eyeliner like the NYX Wonder Pencil and run it along my waterline. This counteracts any redness I may have and just ties all my eye makeup together nicely - It's the perfect finishing touch! It can also be used on my lip line too which is great if you need to tidy up any lipstick mishaps or if you just wanted to make your lips appear fuller.  


I'm not sure if there is any sort of science behind this tip, but it's one I've done for as long as I can remember. I always apply my mascara on my bottom lashes first and then the top to ensure that they don't smudge when I look down - It's the perfect trick that I think everyone should know! 


Have you got any makeup tips and tricks that you swear by?
SHARE:

Saturday 11 March 2017

The Makeup I Have Been Wearing Lately

As a beauty blogger, I always have an excuse to purchase more makeup and try out some new picks too. I don't always get around to telling you what I've been wearing on my face recently or my everyday makeup, so today I thought I'd share a round up of my top new items.  

I'm still trying to form my opinion on the Nars Radiance Primer, but this radiance boosting base is great at perfecting your Spring skin. It's not got a silicone feel to it, but instead it feels slightly more nourishing to the touch and it adds a luminous finish. 

I'm currently having some trouble with my skin, so I used it as an excuse to repurchase my favourite foundation, the L'Oreal Nude Magique Cushion Foundation. It's the only base product at the moment that doesn't irritate or cling to my dry patches, so it gets a thumbs up from me. The dewy finish and hydrating, lightweight formula is one of the best I've ever tried and is a great foolproof foundation for the upcoming hotter months.

I was looking through my makeup collection, sorting out the products I ought to throw out and pieces that I will be selling and I came across the Sleek Face Form Palette, if you've been reading my blog since the beginning then you'll already know that it was the first product I reviewed here and I thought I'd try to rekindle the love. The contour hue is perfect and adds just the right amount of colour to your complexion. I feel like I've been going on about the NYX Ombre Blushers for some time now, but I've been reaching for Mauve Me quite a lot as the matte shade suits my skin tone down to a tee. 

I have only just started trialling the Jouer Long-Wear Lip Crème's* yesterday, so I can't share my opinions on them just yet, but the creamy formula and matte finish is so far so good. I have been trying out Dulce De Leche, a pretty pink that is very fitting for Spring.

Essie have got to be one of, if not my favourite, nail vanish brand and I think I've found the perfect everyday shade. Not Just A Pretty Face is a nude, pink and coral hybrid that is the perfect Spring pick and if you have a similar skin tone to me, it'll actually make your fingers look elongated as it almost matches perfectly. 

What makeup have you been wearing lately?  

*PR Sample/Gifted. 
SHARE:

Friday 10 March 2017

Blogging Tips That Can Be Applied Instantly

I know that these sort of posts have a reputation of being preachy and annoying, but I've found some amazing tips during the time I have been blogging and I thought it would be useful if I shared with you some of my top tricks to improve your blog instantly. Obviously blogging is all about enjoying yourself, but there are a few techniques that can be used to help save time or just make your blog that little bit better. 

Adding A Search Bar + Making Sure Your Links Work | This may seem like a super simple one and more of a reminder than a tip, but you'd be surprised how many blogs I go onto and their social media links don't work. I try and do this monthly just to check that nothing has gone wrong with my HTML and that everything is  easy to navigate around my blog. A search bar is perfect for doing this as you can instantly find a blog post you were looking for with just one or two key words. 


Regular checks of your blog will never do you any harm. Checking how fast your photographs upload, making sure that there isn't an overlap over your content if you use ads and just generally making sure that everything is running smoothly is just something that now comes naturally. 


Pinterest Can Be Your Best Friend | I feel like I need to do a whole post on Pinterest because I managed to go from 100,000 viewers a month to 600,000 in just 4 weeks - Which is a great achievement for somebody who had never really understood Pinterest until recently. Alongside making sure you've added a "pin it" button to your photographs, which is an amazing instant addition that will no doubt get your photographs attention, it's important to use it yourself too. Every morning, I make sure that I've pinned the images from my blog posts onto Pinterest and since then, I get a lot more traffic - Bonus! 


Another action that you can update instantly is the descriptions on your Pinterest boards, Thirteen Thoughts has a great post on it, but put simply, it's where you can describe what that particular board is all about. It can be hard to get into the swing of it in the beginning, but once you've done it, you don't have to worry about it anymore - I need to take my own advice on this one! 


Photograph and Content Width | I got this tip from Mandy's blog post and I knew I had to include it here too. I'm not sure how it works on Wordpress or Squarespace, but on Blogger you can easily make your images the same width throughout by clicking on the photographs and choosing between the varying sizes. I personally always opt for "original size" because it fills the page and makes sure that it is in line with the text. I do this for every photograph because one of the first things I notice in a blog is when images are all different sizes as it becomes very distracting. 

Similarly, I like to make sure that I'm writing in the same front and size throughout as personally, consistency is one of the main things I look for in a blog.

Have you got any simple blog tips you'd like to share? 
SHARE:
Blogger Template Created by pipdig